This feature will be available in Evergreen version 2.2.
Abstract
The cataloging module in version 2.2 includes an enhanced MARC Batch Import interface. This interface features improved matching of records and managing of your import queue. In 2.2, you will be able to specify match points between incoming and existing records. You will also be able to apply filters to your queue that enable you to generate any errors that may have occurred during import. You will also be able to print your queue, email your queue, or export your queue as a CSV file.
Table of Contents
- Permissions
- Record Display Attributes
- Record Match Sets
- Replace Mode
- Quality Metrics
- Import Records
Permissions
To use match sets to import records, you will need the following permission:
ADMIN_IMPORT_MATCH_SET
Record Display Attributes
This feature enables you to specify the tags and subfields that will display in records that appear in the import queue.
Record Match Sets
This feature enables you to create custom match points that you can use to accurately match incoming records with existing catalog records.
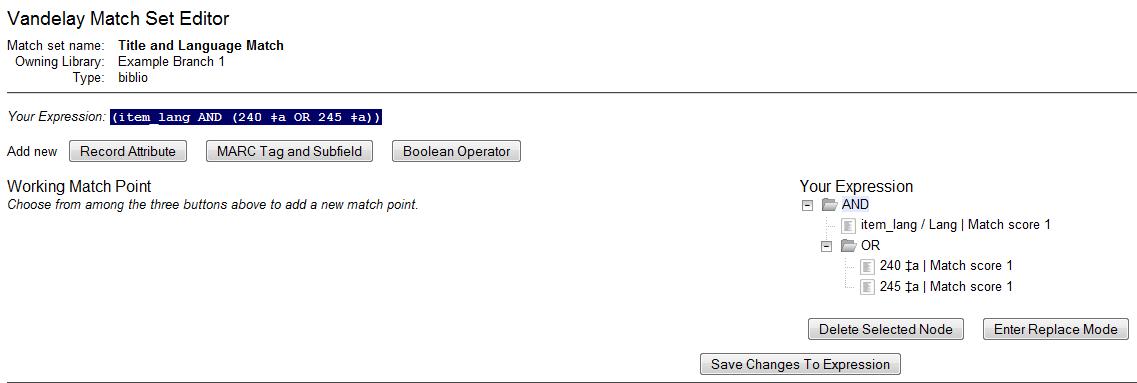
In this example, to demonstrate matching on record attributes and MARC tags and subfields, we will create a record match set that defines a match based on the title of the record, in either the 240 or 245, and the fixed field, Lang. You can add multiple record attributes and MARC tags to customize a record match set.
1) Click Cataloging → MARC Batch Import/Export.
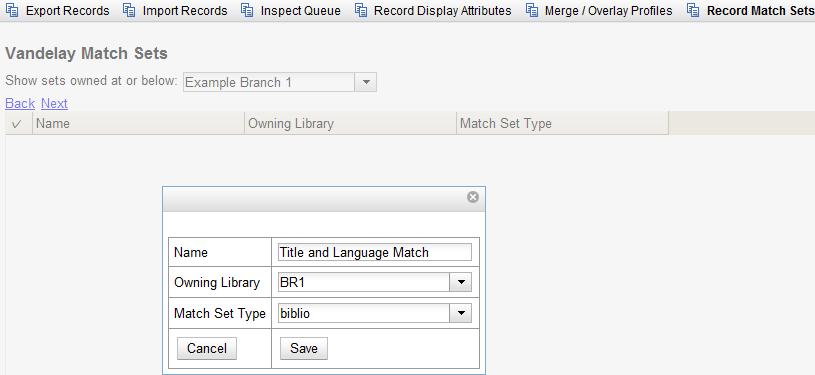
2) Create a new record match set. Click Record Match Sets → New Match Set.
3) Enter a name for the record match set.
4) Select an Owning Library from the drop down menu. Staff with permissions at this location will be able to use this record match set.
5) Select a Match Set Type from the drop down menu. You can create a match set for authority records or bibliographic records.
6) Click Save.
7) The screen will refresh to list the record match set that you created. Click the link to the record match set.
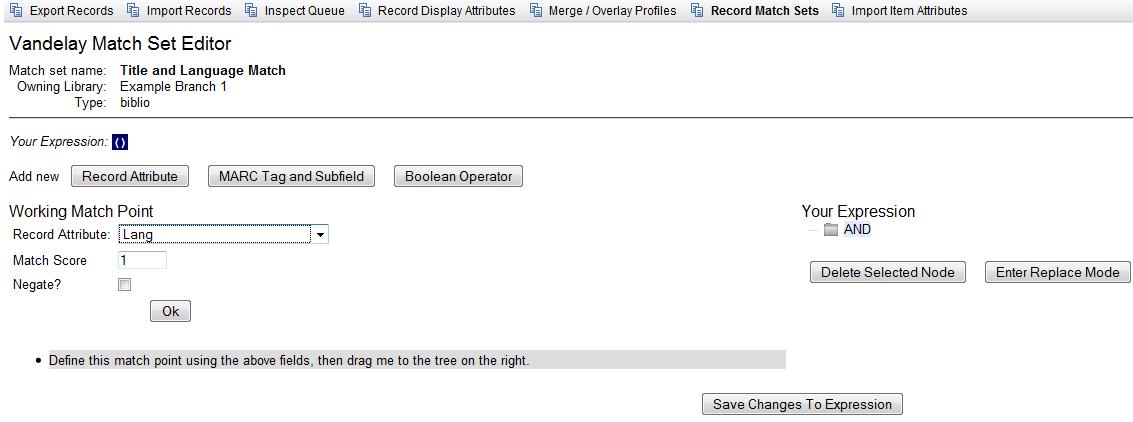
8) Create an expression that will define the match points for the incoming record. You can choose from two areas to create a match: Record Attribute or MARC Tag and Subfield. You can use the Boolean operators AND and OR to combine these elements to create a match set.
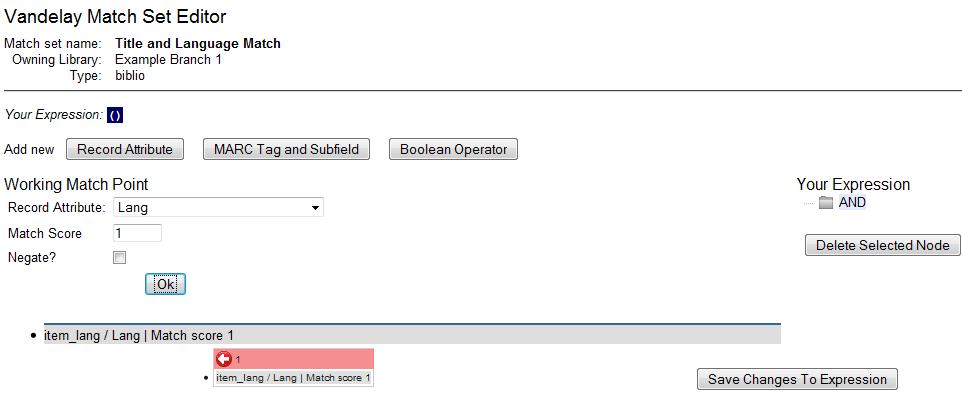
9) Select a Record Attribute from the drop-down menu.
10) Enter a Match Score. The Match Score indicates the relative importance of that match point as Evergreen evaluates an incoming record against an existing record. You can enter any integer into this field. The number that you enter is only important as it relates to other match points. Recommended practice is that you create a match score of one (1) for the least important match point and assign increasing match points to the power of 2 to working points in increasing importance.
11) Check the Negate? box if you want to negate the match point. Checking this box would be the equivalent of applying a Boolean operator of NOT to the match point.
12) Click Ok.
13) Drag the completed match point under the folder with the appropriately-named Boolean folder under the Expression tree.
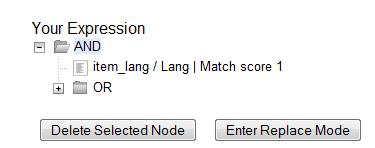
The match point will nest underneath the folder in the Expression tree.
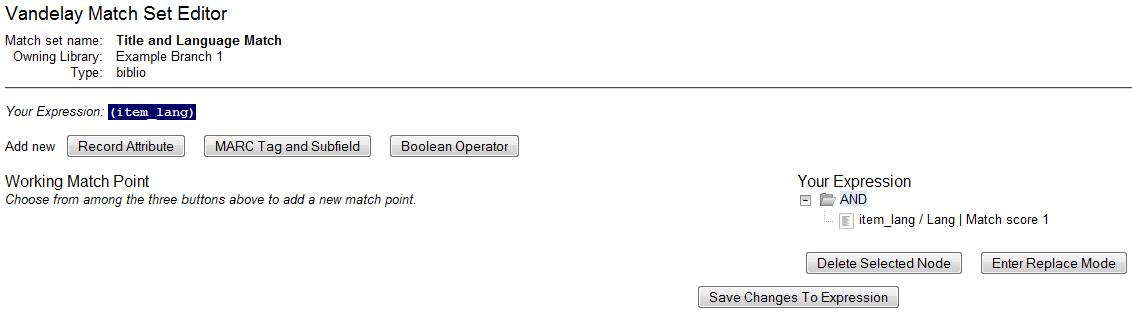
14) Enter another Boolean Operator to further refine your match set.
15) Click Boolean Operator.
16) Select the OR operator from the drop down menu.
17) Click Ok.
18) Drag the operator to the expression tree.
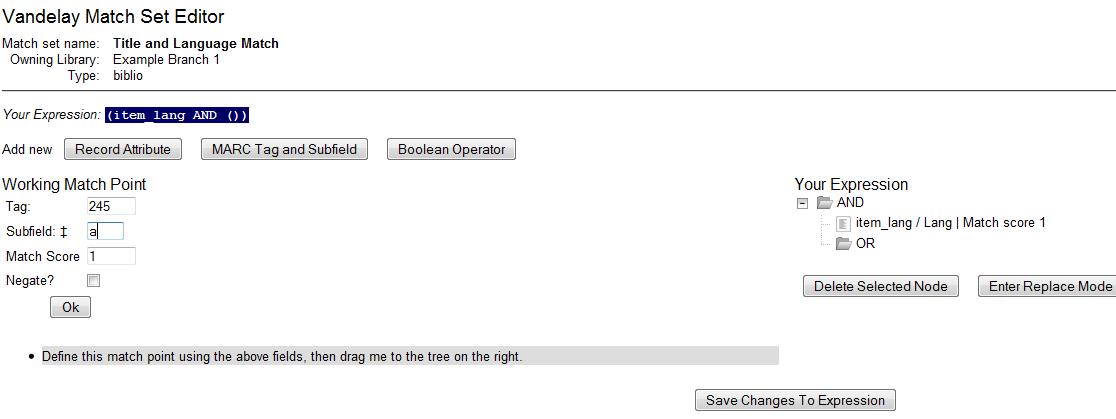
19) Click MARC Tag and Subfield.
20) Enter a MARC tag on which you want the records to match.
21) Enter a subfield on which you want the records to match.
22) Enter a Match Score. The Match Score indicates the relative importance of that match point as Evergreen evaluates an incoming record against an existing record. You can enter any integer into this field. The number that you enter is only important as it relates to other match points. Recommended practice is that you create a match score of one (1) for the least important match point and assign increasing match points to the power of 2 to working points in increasing importance.
23) Check the Negate? box if you want to negate the match point. Checking this box would be the equivalent of applying a Boolean operator of NOT to the match point.
24) Click Ok.
25) Drag the completed match point under the folder with the appropriately-named Boolean folder under the Expression tree. The Expression will build across the top of the screen.
26) Add additional MARC tags or record attributes to build the expression tree.
27) Click Save Changes to Expression.
Replace Mode
Replace Mode enables you to replace an existing part of the expression tree with a new record attribute, MARC tag, or Boolean operator. For example, if the top of the tree is AND, in replace mode, you could change that to an OR.
1) Create a working match point.
2) Click Enter replace mode.
3) Highlight the piece of the tree that you want to replace.
4) Drag the replacement piece over the highlighted piece.
5) Click Exit Replace Mode.
Quality Metrics
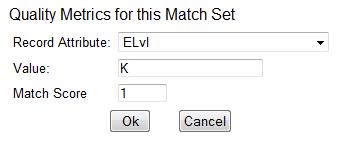
1) Set the Quality Metrics for this Match Set. Quality metrics are used to determine the overall quality of a record. Each metric is given a weight and the total quality value for a record is equal to the sum of all metrics that apply to that record. For example, a record that has been cataloged thoroughly and contains accurate data would be more valuable than one of poor quality. You may want to ensure that the incoming record is of the same or better quality than the record that currently exists in your catalog; otherwise, you may want the match to fail. The quality metric is optional.
2) You can create quality metrics based on the record attribute or the MARC Tag and Subfield.
3) Click Record Attribute.
4) Select an attribute from the drop down menu.
5) Enter a value for the attribute.
6.) Enter a match score. You can enter any integer into this field. The number that you enter is only important as it relates to other quality values for the current configuration. Higher scores would indicate increasing quality of incoming records. You can, as in the expression match score, increase the quality points by increasing subsequent records by a power of 2 (two).
7) Click Ok.
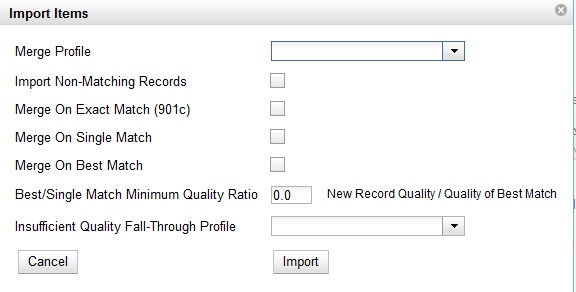
Import Records
The Import Records interface incorporates record match sets, quality metrics, more merging options, and improved ways to manage your queue. In this example, we will import a batch of records. One of the records in the queue will contain a matching record in the catalog that is of lower quality than the incoming record. We will import the record according to the guidelines set by our record match set, quality metrics, and merge/overlay choices that we will select.
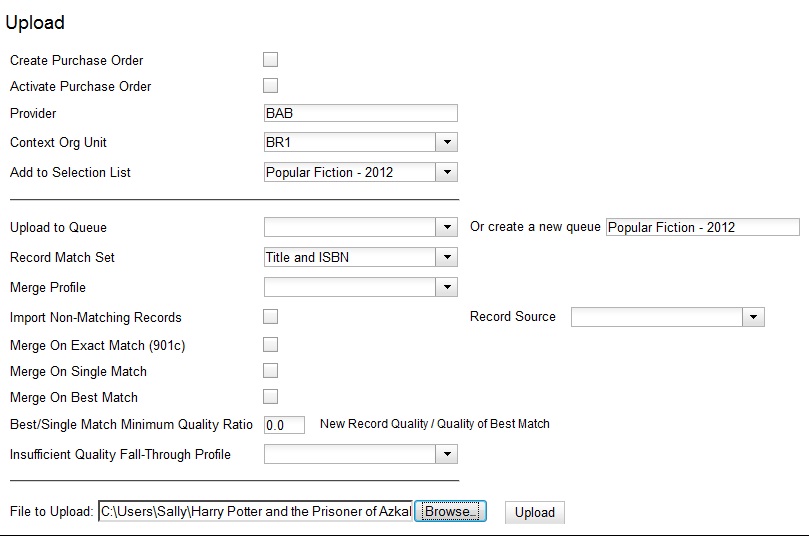
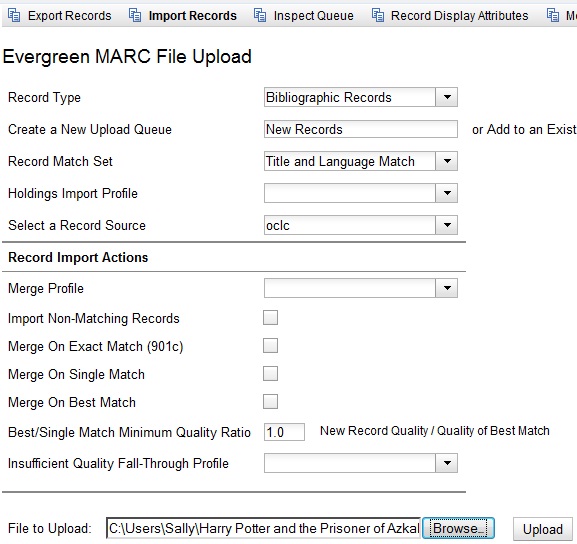
1) Select a Record Type from the drop down menu.
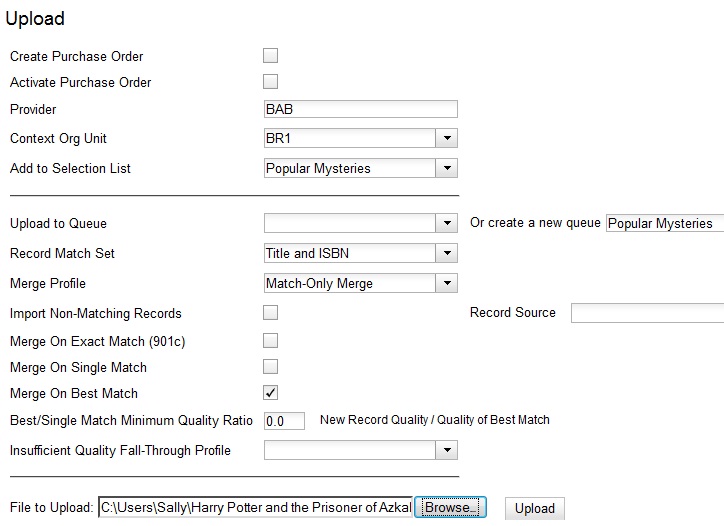
2) Create a queue to which you can upload your records, or add you records to an existing queue. Queues are linked to match sets and a holdings import profile. You cannot change a holdings import or record match set for a queue.
3) Select a Record Match Set from the drop down menu.
4) Select a Holdings Import Profile if you want to import holdings that are attached to your records.
5) Select a Record Source from the drop down menu.
6) Select a Merge Profile. Merge profiles enable you to specify which tags should be removed or preserved in incoming records.
7) Choose one of the following import options if you want to auto-import records:
- Merge on Single Match – Using the Record Match Set, Evergreen will only attempt to perform the merge/overlay action if only one match was found in the catalog.
- Merge on Best Match – If more than one match is found in the catalog for a given record, Evergreen will attempt to perform the merge/overlay action with the best match as defined by the match score and quality metric.
| Note |
Quality ratio affects only the Merge on Single Match and Merge on Best Match options. |
8) Enter a Best/Single Match Minimum Quality Ratio. Divide the incoming record quality score by the record quality score of the best match that might exist in the catalog. By default, Evergreen will assign any record a quality score of 1 (one). If you want to ensure that the inbound record is only imported when it has a higher quality than the best match, then you must enter a ratio that is higher than 1. For example, if you want the incoming record to have twice the quality of an existing record, then you should enter a 2 (two) in this field. If you want to bypass all quality restraints, enter a 0 (zero) in this field.
9) Select an Insufficient Quality Fall-Through Profile if desired. This field enables you to indicate that if the inbound record doees not meet the configured quality standards, then you may still import the record using an alternate merge profile. This field is typically used for selecting a merge profile that allows the user to import holdings attached to a lower quality record without replacing the existing (target) record with the incoming record. This field is optional.
10) Browse to find the appropriate file, and click Upload. The files will be uploaded to a queue.
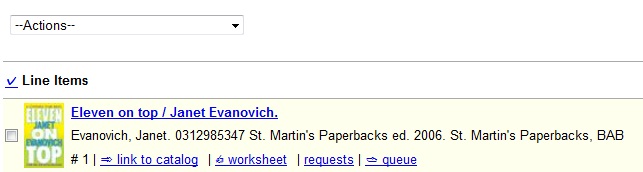
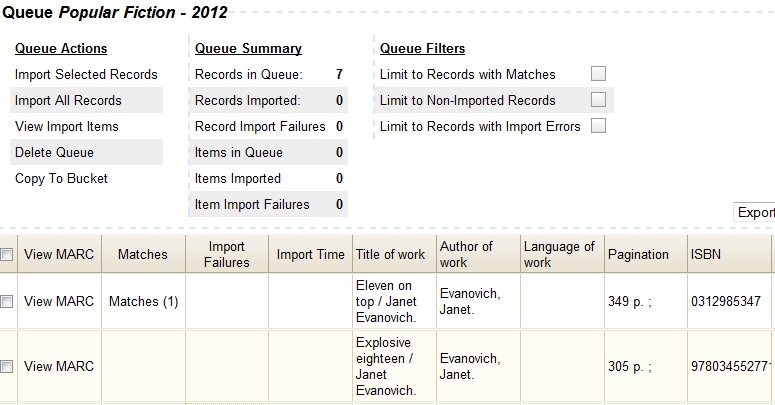
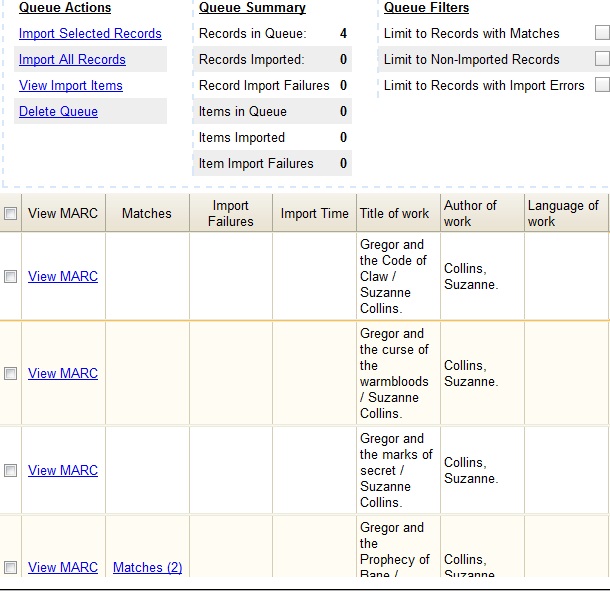
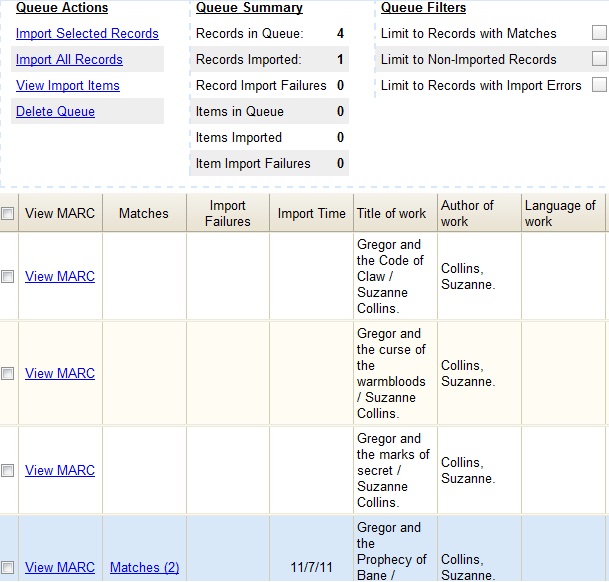
11) The screen will display records that have been uploaded to your queue.
12) If Evergreen indicates that matching records exist, then click the Matches link to view the matching records. Check the box adjacent to the existing record that you want to merge with the incoming record.
13) Click Back to Import Queue.
14) Check the boxes of the records that you want to import, and click Import Selected Records, or click Import All Records.
15) A pop up window will offer you the same import choices that were present on the Import Records screen. You can choose one of the import options, or click Import.
16) The screen will refresh. The Queue Summary indicates that the record was imported. The Import Time column records the date that the record was imported.
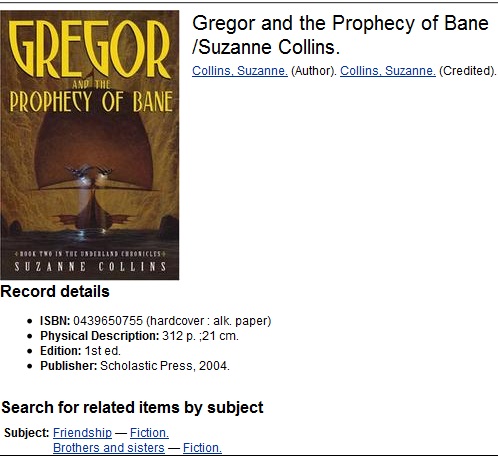
17) Search the catalog to confirm that the record was imported.
Copyright: 2011 Equinox Software. This work by Equinox Software, Inc. is licensed under a Creative Commons Attribution-ShareAlike 3.0 Unported License.
Author: Sally Fortin, Equinox Software